JavaScript: Arduino Slide Controlling a Servo Tutorial
Posted by Rick Waldron
Welcome to the second tutorial in our series geared towards Arduino programming on Node.js, using the Johnny-Five framework. Get caught up here.

In the previous tutorial, you created a program that gave you a simple REPL control interface to a servo motor. In this tutorial, you’ll add a slider to control the servo:


New Parts list:
Tutorial Requirements:
- One (1) Arduino Microcontroller Board
- One (1) 9V wall wart adapter plug or 9v battery harness
- Three (3) Jumper cables: red, black, yellow
- One (1) Any size Servo
- One (1) Slide Potentiometer
First, set up the hardware using this schematic as your guide:
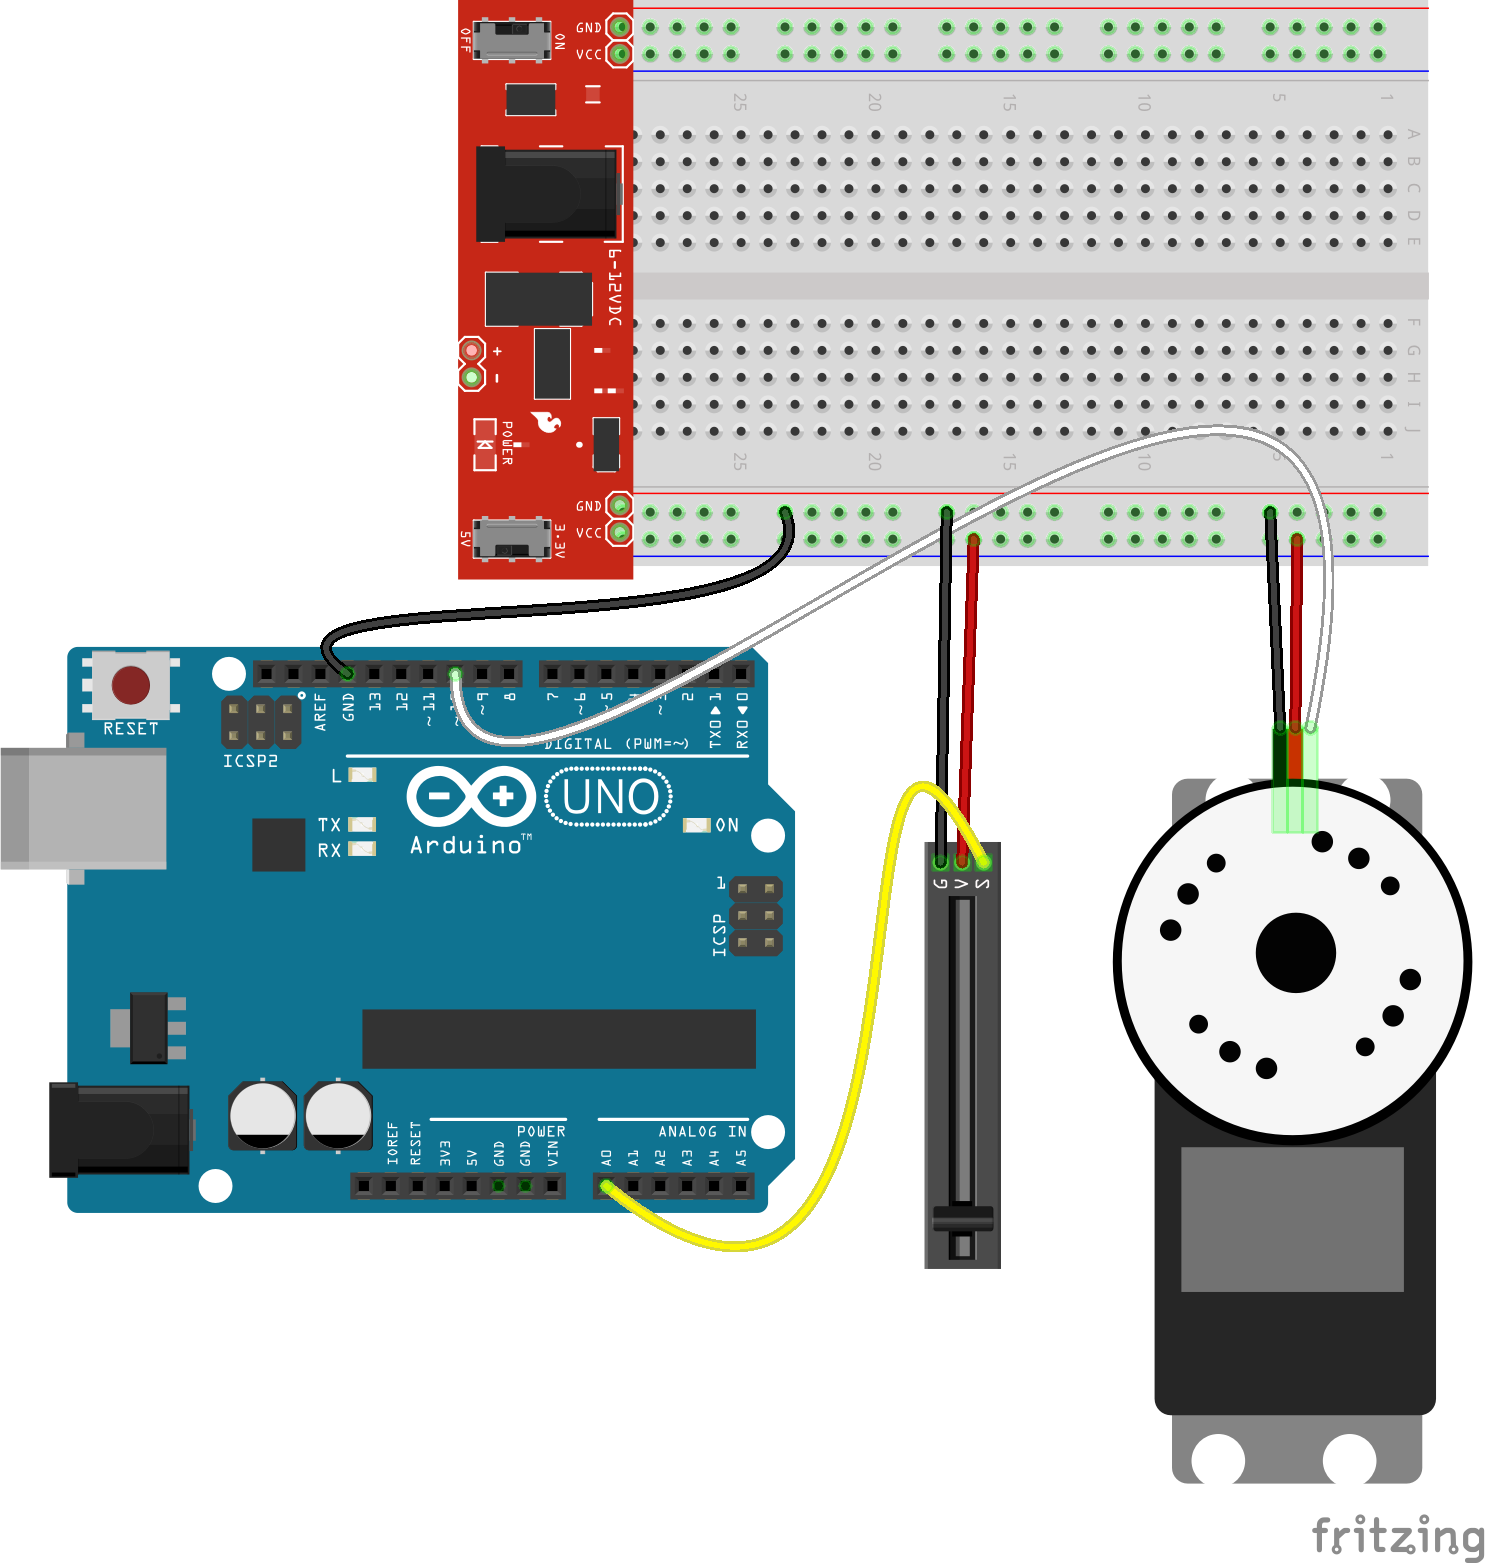
Connect the following…
- Servo: Black > GND
- Servo: Red > 5v
- Servo: Signal > Digital PWM Pin 9
- Slider: Black > GND
- Slider: Red > 5v
- Slider: Signal > Analog 0
- Microcontroller > USB
- 9V Power
Assuming you’re using the actual repo, open up eg/slider-servo-control.js, or follow along here…
slider-servo-control.js
var five = require("../lib/johnny-five.js"),
    board, slider, servo, scalingRange;

board = new five.Board();

board.on("ready", function() {

  scalingRange = [ 0, 170 ];

  slider = new five.Sensor({
    pin: "A0",
    freq: 50
  });

  servo = new five.Servo({
    pin: 9,
    range: scalingRange
  });


  // The slider's value will be scaled to match the servo's movement range

  slider.scale( scalingRange ).on("slide", function( err, value ) {

    servo.move( Math.floor(this.value) );

  });
});
And that’s it!
Run node eg/slider-servo-control.js1 and try moving the slider up and down — the servo should rotate back and forth between 0-180 degrees (or whatever scalingRange was provided).
Remember to watch this space for more tutorials!
Note: There is a known issue in where the Firmata protocol layer has issues freeing itself on the serial line which results in the program hanging in the ready state. For now, ^C to kill the hanging program and simply run it again.