Getting Started with VoiceOver & Accessibility
Posted by Sue Lockwood
If you are a web developer working on a Mac, you can become a hero for thousands of people out there by assuring that anything you create for the web can be read properly by a screen reader. This blog post is going to teach you how to access and wield this super power that is built into the OS you use everyday.
Using VoiceOver
MacOS has a built-in screen reading tool called VoiceOver. You can turn it on using command + F5 or through the System Preferences under Accessibility. Once on, you might be overwhelmed with how chatty your computer becomes. In System Preferences, click the button ‘Open VoiceOver Utility’ and adjust some options. I recommend turning the Verbosity down to Low.
While you’re in this menu, you can also change the voice of your reader, the pitch and the speed in which it reads the text and gives commands. It’s worth looking through the options and picking a voice that you won’t be annoyed by, since your computer has now gained sentience and has a lot to talk about.
My computer will not stop talking, now what?
Congratulations, you now have a screen reader running on your computer, but it keeps talking at you and not reading your site. When I first started using a screen reader I was confused and unable to navigate around ANY website if it wasn’t simply a page with text on it. I wondered was the web really this horribly inaccessible or did I just not understand how to use the screen reader? Turned out, it’s a bit of both.
You have your browser open on a page you want the reader to look at. Your computer will be telling you commands to do to interact with the page along the lines of:
You’re currently on HTML content. To enter the web area, press Control-Option-Shift-Down Arrow.
After doing that you might hear:
You’re now on a text area, inside of HTML content. To exit this web area, press Control-Option-Shift-Up arrow
Hurray, an infinite loop and Thor (as I’m now calling my screenreader) is not telling me what’s written on the page. I try tabbing, and that takes me to clickable items on the page such as buttons, form fields and links. How do I navigate? How do I get it to read the page?
VoiceOver has built in commands to get it to do your bidding. Once you learn them, navigating gets easier, but it won’t tell you the commands in it’s Thor voice. Here’s some basic VoiceOver commands to get you on your way. (Some of them hurt my hands—if you plan to use VO all day, you might want to look into changing the hotkeys.)
Reading
- Start Reading:
Control+Option+A - Stop:
Control - Top of the page:
Control+Option+fn+left arrow - Bottom of the page:
Control+Option+fn+right arrow - Read from the top to the current location:
Control+Option+B - Read previous:
Control+Option+left arrow - Read next:
Control+Option+right arrow
Navigating
- Go to next link or form element:
tab(you got this one) - Go to next link:
Control+Option+Command+L - Go to next heading:
Control+Option+Command+H - Click the link or focus the form element:
Control+Option+Space
Most commands start with Control+Option . When you read documentation that says VO+[key], that stands for Control+Option+[key].
Rotor Menu: your new favorite menu
Time to meet your new favorite menu. Pressing Control+option+U will bring up an overlay that you can navigate with the arrow keys. This is called the Rotor menu. It has menus for:
- Links – all of the
<a>tags on the page - Headers – all h1, h2, h3… content
- Form Controls – all form elements on the page
- Web Spots – VoiceOver evaluates the visual design of a page, groups items based on the design. These can be things like leader boards for sports, or related articles.
- Tables – table elements on the page
- Images – all the image elements on the page
- Landmarks- Aria-label content. (This will be covered later)
- Window Spots – Window spots include key areas of an app window, such as a search field or sidebar, like Web Spots, VoiceOver creates these
Rotor Menu Commands
- Open Rotor
Control + Option + U - Close Rotor
Escape - Next Window
Right Arrow - Previous Window
Left Arrow - One List Item Down
Down Arrow - One List Item Up
Up Arrow - Go to Item
Enter or Return - Read After Item
Control + Option + A
I’m not going to go in detail about all the capabilities of VoiceOver, because frankly, I don’t know them. You don’t need to know everything about VoiceOver to start using it. A combination of the Rotor Menu and being able to navigate and read the page is enough to get started on auditing your site/app for accessibility.
Let’s browse
In addition to using a new tool, it is overwhelming to do an audit without knowing where to begin. I recommend you first start looking at other websites you use every day to see how well they are doing. First, this will let you play around with the tool without needing an application of your own. And second, you need to know that most sites do a terrible job at accessibility and this is not acceptable.
Making a site accessible is not a situation where you check off boxes on a list and you’re done. User Experience for complex UI modules using a screen reader requires just as much thoughtfulness as it does when you’re designing them for visual interaction. That being said, I don’t want anyone to get discouraged, so here’s some suggestions on what to look for in a site that is doing a good job that you can later apply to your own work.
Visibility & Skip to Content Links
Did you know there are different kinds of invisible? With CSS you can collapse, you can move things off the screen, clip the content, set set visibility:hidden or display:none. All of these techniques, depending on your browser, will make contents visually disappear, and two of them will make content unreadable by the screen reader.
Try using VoiceOver on this simple example page. Type control+option+A to make VoiceOver start reading the page.
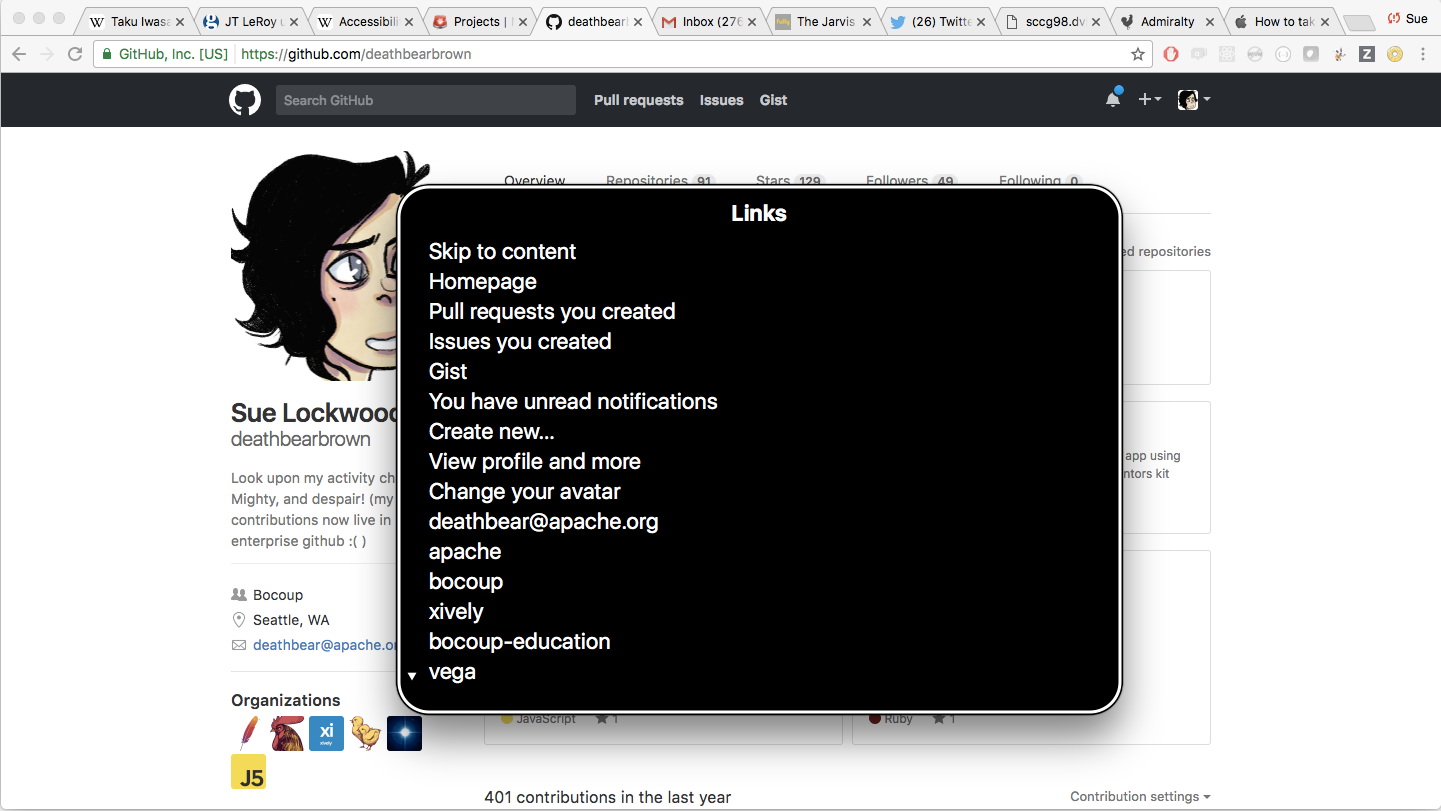
If you view source, you can see there is text that is not being read. One case where you’ll want to visually hide text but have it but read by the screen reader is when you put a Skip To Content link at the beginning of your site. GitHub and bocoup.com are good examples of where a Skip to ontent link is used. This is a link on the top of the page that you cannot see without a screen reader. Clicking this anchor link will send you to the main content of your site. You know, that div, section, main or article, that has id="main" where the important meat of your site or application lives. If you look at an average website, there are a lot of elements (navigation, ads, sidebars, etc) that you’d have to navigate through using the screen reader before you get to the main content of the page. This link will get you there faster.
To hide the ‘Skip to Content’ link, use the method described on Snook.ca for Positioned, Clipped, and (almost) Collapsed.
.element-invisible {
  position: absolute !important;
  height: 1px;
  width: 1px;
  overflow: hidden;
  clip: rect(1px 1px 1px 1px); /* IE6, IE7 */
  clip: rect(1px, 1px, 1px, 1px);
}
This will hide it from everyone except screen readers. If you use display:none; or visibility:hidden; the element will be hidden from screen readers. Be mindful of this.
Sometimes our UX choices conflict with the UX that would work well with a screen reader. Remember when we’d make massive one page applications that would show and hide data based on what the current tab? We did that to visually tame the large amount of data we had on the page. Screen readers don’t care about aesthetics. Using the “Snook.ca method” to hide those content areas will make it easier for the screen reader to find and read your content.
Additionally, if you want something visually displayed on our site but not read by the screen reader use the ARIA attribute aria-hidden="true". Unfortunately, based on browser/a11y tech support this is not a guaranteed solution for all browsers. More on ARIA later.
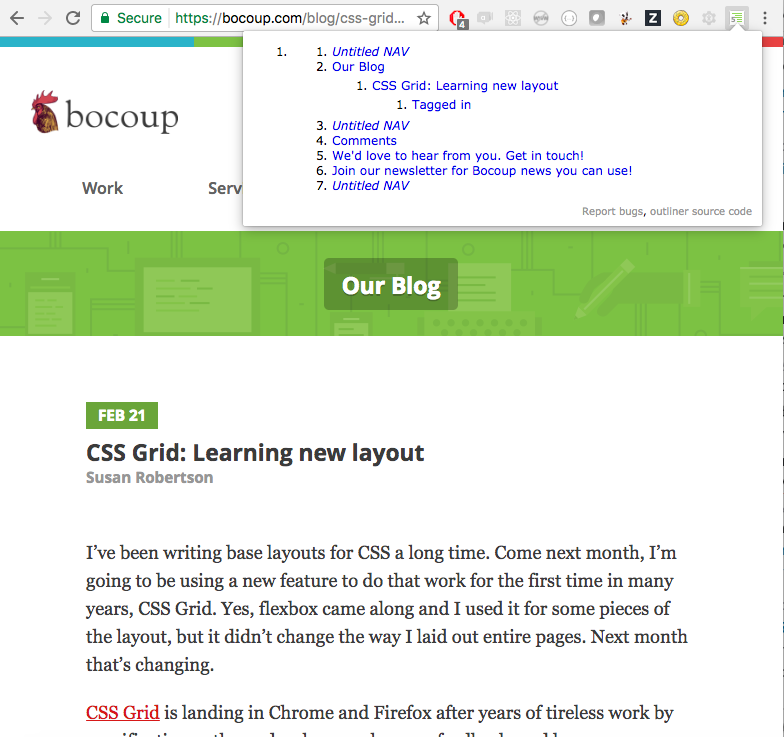
Headings are important
Go to your web site and after opening up the Rotor Menu, click the right arrow to get to the “Headers” section. What do you see? If it’s all H1 tags, that’s not great news. Using only H1s on your page says “all of these things are the most important.” Header tags are not just about visually making your website appealing. They describe the importance of content. H1 are usually your site’s name and logo. H2 is your main content.
When styling your page, try not to put CSS styles on H1-H7 elements. Instead create classes that can be added to them. This way,if there’s a consistent header visual style that is used in multiple places, you can use different header tags even if all the information should not all be at the same level of importance.
Working on modularized apps, you might lose context of which module is using what markup. The code is in different files, in different folders and then webpack gathers it back together in your build process. Try breaking your css path to see your site without any styling. You can do this in your browser using dev tools. Seeing your app’s bones will give you a better idea of which modules need some semantic adjustments.
Screen Readers & Interactive Elements
You can view the links on your page in the Rotor menu, or cycle through them using Control+Option+Command+L When you want to interact with a link, press Control+Option+Space. You built your site, so you know which elements are interactive, but maybe not all of them are showing up when you tab through the page.
Have you ever created a modal or a todo list, or some sort of UI component where you wrote the following html:
<span class="close">Close</span> or <div class="close">Close</div>
The Screen Reader will read this and say ‘Close’ but it will not suggest that you interact with it. What about those parent divs of content that you click on to get to more details? Nope. It doesn’t know what to do with that either. Screen readers know that the following elements are interactive: links, form fields, and buttons. If any non form element on your page is interactive, use a link or a button. If that doesn’t work with your design, try adding a visibility hidden link or button that the screen reader will find.
ARIA: some basics
ARIA stands for Accessible Rich Internet Applications and are a set of special attributes you can add to your markup to make it more accessible. I would love to be paid to make a website that is a wall of text with headings like it’s 1998, but we live in THE FUTURE and in the future we have a lot of UI patterns to visually organize the chaos of our content. It helps to give the screen reader hints when you are using these patterns and you can do that with ARIA attributes.
Aria-labels
Open the Rotor menu and cycle through using the right arrow key until you get to Landmarks. This is where anything you assign an ‘aria-label’ will show up.
Add aria-labels to elements when the content inside an interactive tag relies on visual information to understand its purpose, e.g. – an image, symbol or an icon.
<button aria-label="Close" class="close">X</button>
Now when using a screen reader, the user can find the close button. The best thing to do in this situation, better than just adding the aria-label, is to use the text ‘close’ and then style the button to visually look like an X.
Aria-roles
We often take for granted how much UI patterns have trained us to identify what a module is and how to interact with it. When you see a div styled a certain way or a familiar icon, you know “this is an alert” or “this area is the menu.” If you want the screen reader to know that, you need to add aria-role attribute to the element and tell it specifically what it’s looking at.
<p role="alert">You must agree with our terms of service to create an account.</p>
You can find a list of ARIA roles here.
If you want to learn more things you can do to make your site accessible, my coworker, Susan Robertson, has written a series of blog posts called Accessibility Wins that cover ARIA, keyboard navigation and color.
VoiceOver isn’t a perfect Screen Reader
Here’s where I drop some bummers on you. While VoiceOver is convenient and a great place to start when doing accessibility work for devs using Macs, only 1/3rd of people who need screen readers to view the web use VO. Most people use Windows screen readers.
Screen Readers made for Windows have three different interaction modes:
- Read/Browse mode – use arrow keys for reading and hot keys to reread, go back, go forward etc
- Forms/Focus mode – in this mode, the screen reader will indicate you entered it with a tone. Then you can interact with the form using your keyboard without any of your screen reader overrides getting in the way
- Application Mode – interact with complex application widgets. This mode is like Forms/Focus, except for non form element widgets, such as complex tree navigation. Once interacting with the element, a user can use their keyboard without their VO overrides getting in the way.
As of today, VoiceOver does not have a Forms/Focus mode. That means you lack the UX experience of entering a mode where you are able to use your keyboard naturally to interact with a form.
It’s a good idea to install an additional screen reader, like NVDA, on the machine or VM you use to do IE testing. When you do testing for IE, open your Windows screen reader to make sure that all your complex interactions work for more robust screen readers. It’s enough to use VoiceOver as your primary means to get to an accessible place, but adding Windows screen reader compatibility testing to your routine will improve your accessibility game even more.
Don’t make this a chore; Make it a habit
Once you get started with accessibility, make it part of how you code. If it starts feeling like a burden, try to think of it this way: Making something accessible for a screen reader is just writing semantic HTML and adding some attributes to describe a module – the real pain in the ass is writing CSS.
Next blog post: Tricking other people into writing your CSS.