Customizing the RobotsConf Sumobot with Johnny-Five
Posted by Rick Waldron
In the first post in this series, I walked through inventory, preparation, calibration and assembly of the SumoBot Kit that was provided to all attendees of this year’s RobotsConf. From there, I showed how to control the bot with an Arduino Uno, Electric Imp and Spark Core.
In this article, I’m going walk through two customizations for the SumoBot that will give it some character. This entire article will assume two things:
- You have already read Making the RobotsConf Sumobot with Johnny-Five and completed all of the preparatory and assembly tasks described therein.
- You have completed at least one of following:
Stop & Go
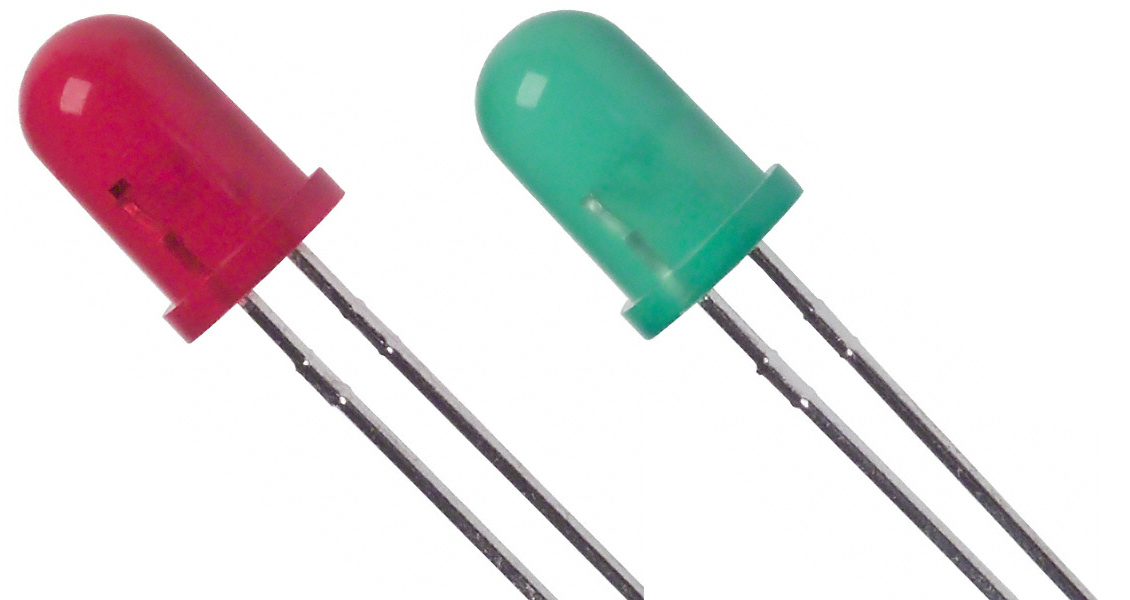
This customization will add two LED’s, red and green, that light up according to the state of the SumoBot: red if stopped and green if moving. This may not seem like a very interesting customization since you can observe this state by just looking at the bot, but it serves to expose you to programming other forms of output with the existing control mechanism.
The following items can be found in the ARDX Kit:
- Red LED
- Green LED
- 2 Green jumpers
- 2 Black jumpers
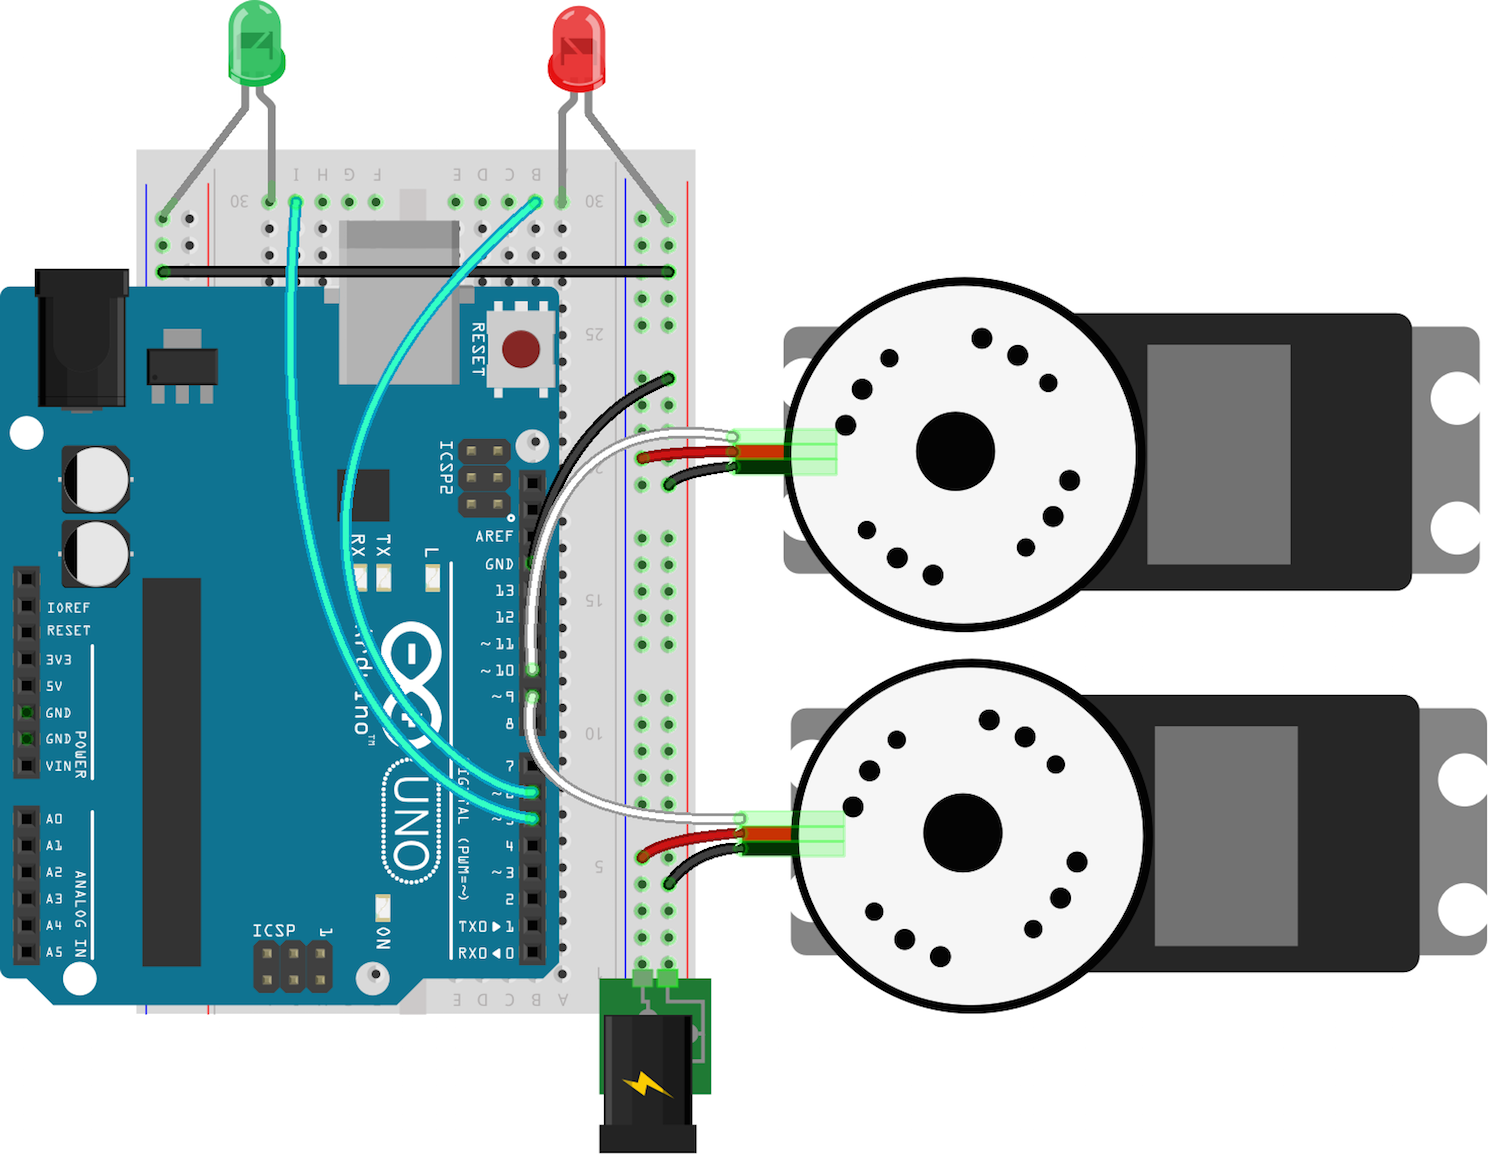
The following diagrams describe the circuit layout for each of the controller boards:
Arduino Uno
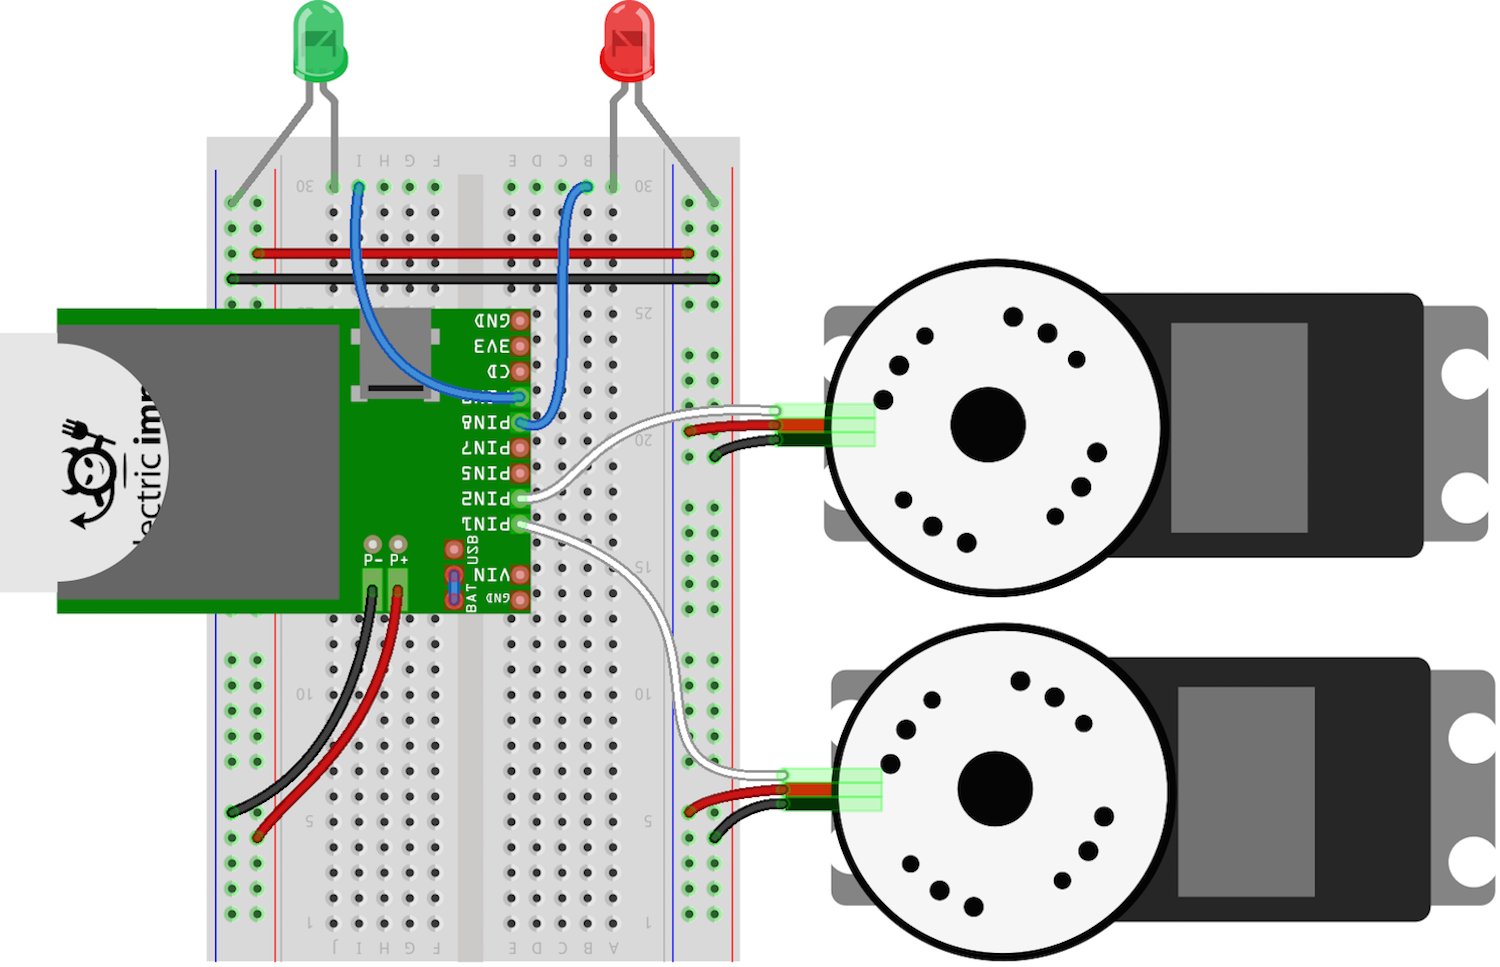
Electric Imp
Spark Core

The program will be almost the same for each controller board, the differences being:
- Which IO Plugin is used to communicate with the board (none, in the Arduino Uno case)
- Which pins are used to control the hardware.
Here’s the program as it would appear for the Electric Imp:
var keypress = require("keypress");
var Imp = require("imp-io");
var five = require("johnny-five");
var Sumobot = require("sumobot")(five);

keypress(process.stdin);

var board = new five.Board({
  io: new Imp({
    agent: "agent id"
  })
});

board.on("ready", function() {

  console.log("Welcome to Sumobot Jr: Stop & Go!");

  // Initialize a new Sumobot.
  // - Left Servo is attached to pin 1
  // - Right Servo is attached to pin 2
  // - Speed set to 0.50 (half of max speed)
  //
  var bot = new Sumobot({
    left: 1,
    right: 2,
    speed: 0.50
  });

  var red = new five.Led(8);
  var green = new five.Led(9);
  var leds = new five.Leds([red, green]);

  // Maps key names to bot methods
  var actions = {
    up: "fwd",
    down: "rev",
    left: "left",
    right: "right",
    space: "stop"
  };

  // Ensure the bot is stopped
  bot.stop();
  leds.off();

  // A bit of keypress ceremony ;)
  process.stdin.resume();
  process.stdin.setEncoding("utf8");
  process.stdin.setRawMode(true);

  process.stdin.on("keypress", function(ch, key) {
    var action;

    if (!key) {
      return;
    }

    leds.off();

    action = actions[key.name] || key.name;

    if (action == "q") {
      console.log("Quitting");
      bot.stop();
      setTimeout(process.exit, 500);
    }

    if (bot[action]) {
      bot[action]();

      if (action === "stop") {
        red.on();
      } else {
        green.on();
      }
    }
  });
});
Here’s the Electric Imp version in action:
Light Bot
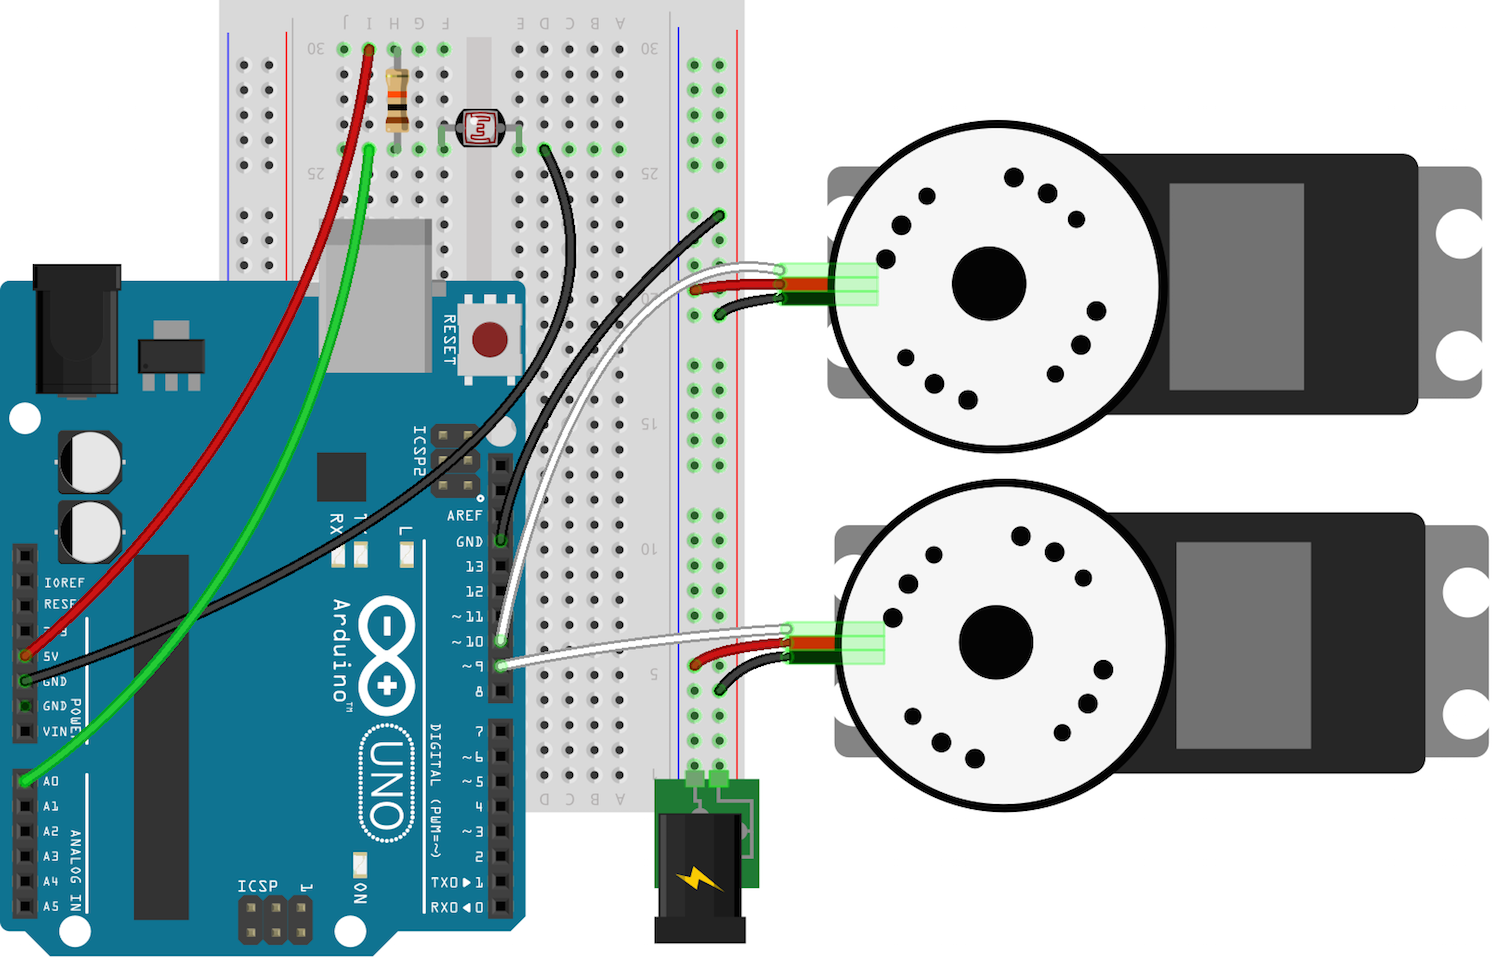
This customization will add a Light Dependent Resistor (Photocell) to the front of the bot to allow controlling the bot with a light source. When light is directed at the front of the SumoBot, it will move forward; when no light is present, it will stop. This is a simple demonstration of processing analog sensor input into actuator output.
The following items can be found in the ARDX Kit:
- Photocell
- 10kΩ resistor

The follow shows the circuit diagrams for each of the controller boards:
Arduino Uno
Electric Imp
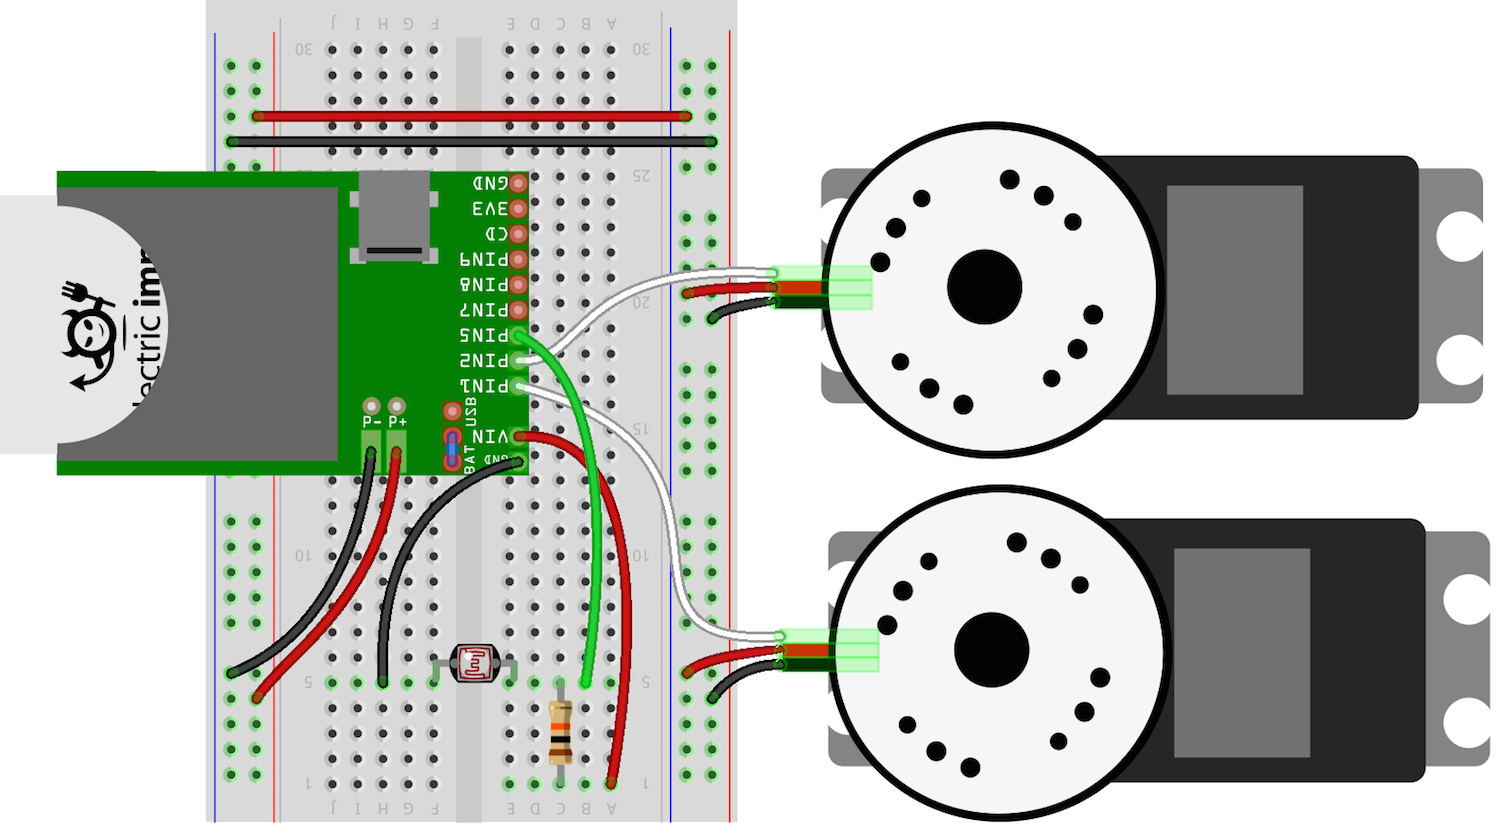
Spark Core

As with the earlier program, each controller will dictate two minor differences:
- Which IO Plugin is used to communicate with the board (none, in the Arduino Uno case)
- Which pins are used to control the hardware.
Here’s the program as it would appear for the Spark Core:
var Spark = require("spark-io");
var five = require("johnny-five");
var Sumobot = require("sumobot")(five);

var board = new five.Board({
  io: new Spark({
    token: process.env.SPARK_TOKEN,
    deviceId: process.env.SPARK_DEVICE
  })
});

board.on("ready", function() {

  console.log("Welcome to Sumobot Jr: Light Bot!");

  var bot = new Sumobot({
    left: "D0",
    right: "D1",
    speed: 0.50
  });

  var light = new five.Sensor("A0");

  // More light => higher resistance => lower ADC value
  // If the reading is < 512, it's in direct light
  light.booleanAt(512).on("change", function() {
    bot[this.boolean ? "stop" : "fwd"]();
  });

  // Ensure the bot is stopped
  bot.stop();
});
Here’s the Spark Core version in action:
Exploration
In this series you learned how to assemble, configure, calibrate, program and customize the SumoBot Kit. This knowledge and experience has hopefully given you the confidence and interest to continue exploring the capabilities of your bot. With a bit of imagination and the provided materials there are nearly infinite possibilities!